Adding a Printer to the Application Server
Echo form printing (Checks, Purchase Orders) is all done from the Application Server. The printers are pulled when the New World ERP App Server (Control Panel > Administrative Tools > Services) is started. This pull also happens when you start the Logos Management Console using the start button. The following steps show you how to add a printer to the Application Server and to the Echo Forms as an available printer.
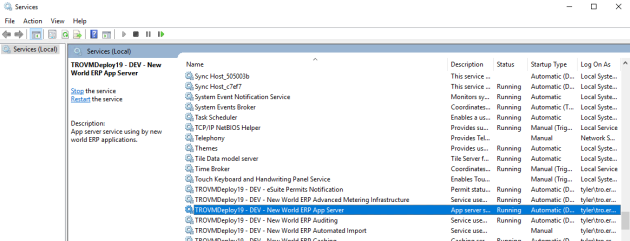
- Navigate to Start > Control Panel > Administrative Tools > Services on the Application Server.
-
Locate “New World ERP App Server” service. It will be prefaced by the instance name of your server. Right click on it and choose Properties:
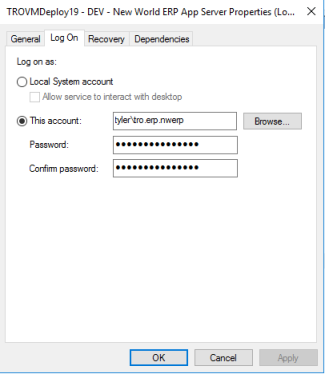
-
On the Log On tab you should see a user. This user is running the Logos Service on the Application Server and needs full security to the printers installed on the App Server:
- After giving security access to the printers in Control Panel > Printers to the user running the New World ERP App Service, stop and start the New World ERP App Service. These printers will not show up in new world ERP until this has occurred.
- After starting the Management Console, go back into New World ERP and navigate to Maintenance > New World ERP Suite > System > Form Layout.
-
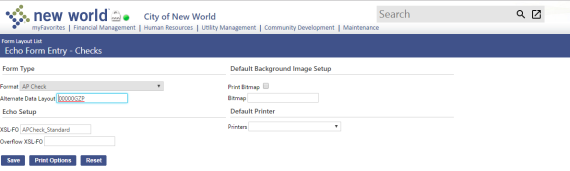
Click on a Form. For this example, we will click on AP Check:
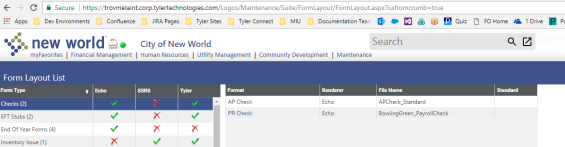
The following page displays:
- Click on the Print Options button.
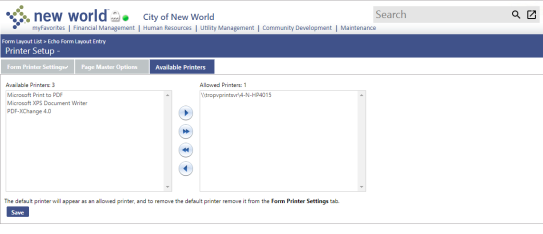
- Click the Available Printers tab.
-
The printers assigned to the form will show on the right side of the list box. Available printers will show on the left side of the list box: